Valve guides are critical for engine performance‚ ensuring proper valve alignment and preventing oil consumption. This guide provides a comprehensive‚ step-by-step approach to installing valve guides‚ detailing tools‚ materials‚ and expert tips for a successful replacement process. Designed for car enthusiasts and mechanics‚ it covers everything from preparation to final inspection.
1.1. Overview of Valve Guides and Their Importance
Valve guides play a crucial role in engine performance by aligning valve stems and preventing oil leakage into combustion chambers. They ensure proper valve operation‚ maintaining compression and preventing overheating. Worn guides can lead to oil consumption‚ rough idling‚ and reduced power. Replacing them requires precision to avoid further damage. Proper installation is essential for optimal engine function and longevity.
1.2. Purpose of the Article
The purpose of this article is to provide a detailed guide on replacing valve guides‚ covering essential tools‚ materials‚ and techniques. It aims to help mechanics and enthusiasts understand the process‚ from measuring to installation. The guide emphasizes precision and safety‚ ensuring a successful replacement. By following the steps‚ readers can restore engine performance and prevent future issues. This comprehensive approach covers all aspects of valve guide installation.
Understanding the Importance of Valve Guides
Valve guides play a crucial role in maintaining engine performance by ensuring proper valve alignment and preventing excessive oil consumption. They are essential for smooth engine operation.
2.1. Role of Valve Guides in Engine Performance
Valve guides are essential for maintaining proper engine performance by ensuring valves operate smoothly and efficiently. They align valve stems correctly‚ preventing misalignment that could lead to poor engine performance. Guides also prevent excessive oil consumption by sealing the valve stem‚ which helps maintain proper compression and reduces emissions. If guides wear out‚ oil can leak into combustion chambers‚ causing blue smoke and decreased efficiency. Properly functioning guides are vital for optimal engine power and longevity.
2.2. Symptoms of Worn or Damaged Valve Guides
Worn or damaged valve guides often lead to increased oil consumption‚ rough idling‚ and engine overheating. They can cause oil to leak into combustion chambers‚ resulting in blue smoke from the exhaust. Additionally‚ damaged guides may lead to poor engine performance‚ reduced power output‚ and decreased fuel efficiency. If left unaddressed‚ these issues can escalate‚ causing further damage to engine components. Recognizing these symptoms early is crucial for timely repairs.
Tools and Materials Needed
Essential tools include an air hammer‚ dial bore gauge‚ precision reamers‚ and a valve spring compressor. Materials needed are new valve guides‚ seals‚ and engine oil for lubrication.
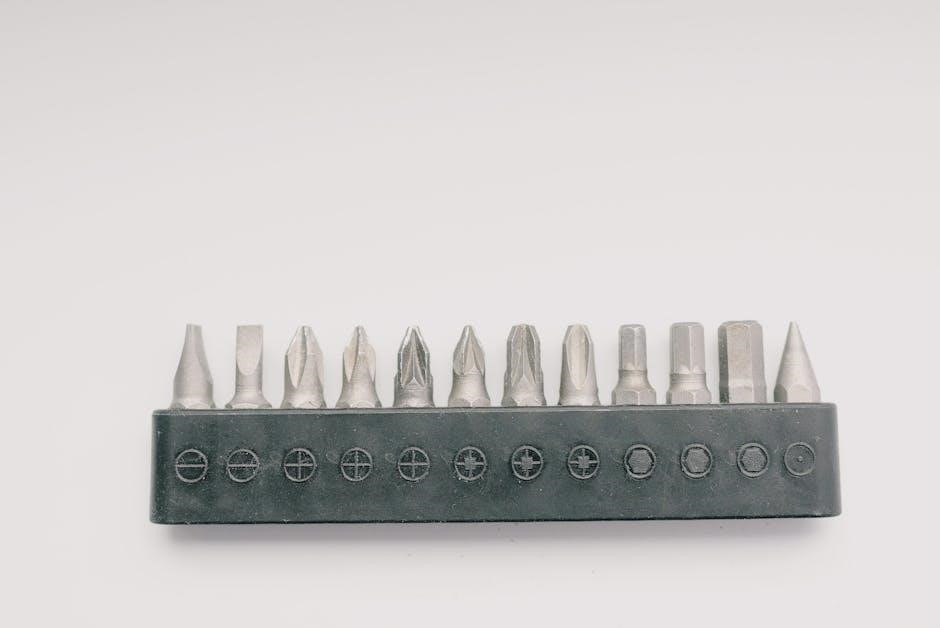
3.1. Essential Tools for the Installation Process
The installation process requires specialized tools‚ including an air hammer for removing old guides‚ a dial bore gauge for precise measurements‚ and a valve spring compressor to depress springs. Additional tools include precision reamers for resizing guide bores‚ a pilot installer for aligning new guides‚ and a seal installation tool to prevent damage to new seals. Specialized tools like the C-4682 valve spring compressor are also necessary for certain engine types. These tools ensure accurate and efficient installation‚ avoiding potential damage to engine components.
3.2. Required Materials and Components
The installation process requires new valve guides‚ which must be sized to fit the cylinder head’s specifications. Bronze guide liners are an optional solution for worn guides. Valve seals are essential to prevent oil leakage and ensure proper combustion. Additional materials include reamers for resizing guide bores‚ lubricants like engine oil or assembly lube‚ and precision gauges for accurate measurements. Ensure all components are compatible with your engine type and specifications for a successful installation.
Measuring the Existing Valve Guides
Accurate measurement ensures proper fit and functionality. Use precision tools like a dial bore gauge to determine the guide’s inside diameter‚ ensuring consistency and avoiding oversizing.
4.1. Importance of Accurate Measurements
Accurate measurements are crucial for ensuring the correct fit of new valve guides. Incorrect dimensions can lead to improper alignment‚ increased wear‚ and potential engine damage. Using precision tools like a dial bore gauge ensures the guide bores are measured correctly‚ preventing oversizing or undersizing‚ which can compromise engine performance and longevity. This step is essential for maintaining optimal engine operation and avoiding costly future repairs.
4.2. How to Measure the Inside Diameter of the Guides
To measure the inside diameter of the valve guides accurately‚ use a dial bore gauge. Start by ensuring the guide is clean and free from debris. Insert the gauge into the guide bore‚ carefully rotating it to ensure full contact with the inner surface. Take multiple measurements at different angles to confirm consistency. This precise measurement ensures the correct size of the new guide‚ preventing oversizing or undersizing‚ which can lead to improper fitment and engine issues.
Removing the Old Valve Guides
Removing old valve guides requires careful steps to avoid damaging the cylinder head. Use specialized tools like an air hammer or puller for safe extraction.
5.1. Steps to Remove Worn or Damaged Guides
Begin by gathering essential tools‚ including an air hammer‚ puller‚ and protective gear. Apply heat to the guide area to loosen the fit. Use a pilot bearing to center the puller‚ ensuring even pressure. Gently tap the guide with the hammer to avoid cracking the head. Once loosened‚ carefully extract the guide. If stubborn‚ reapply heat and repeat. After removal‚ use a reamer to clean the bore for a smooth installation process.
5.2. Special Tools and Techniques for Removal
Specialized tools like air hammers‚ guide pullers‚ and pilot bearings are essential for safe removal. Apply heat to loosen the guide‚ then use the puller to avoid damaging the cylinder head. A dial bore gauge can measure wear‚ ensuring precise removal. For stubborn guides‚ apply penetrating oil and let it sit. Always use protective gear and work methodically to prevent costly damage during the process. These tools and techniques ensure efficient and damage-free removal of worn guides.

Preparing the Cylinder Head
Cleaning and inspecting the cylinder head ensures a smooth installation. Remove carbon deposits using a reamer‚ then inspect for cracks or damage. Proper preparation guarantees a precise fit for the new guides‚ enhancing engine performance and longevity.
6.1. Cleaning and Inspecting the Cylinder Head
Cleaning and inspecting the cylinder head is crucial for a successful valve guide installation. Start by removing carbon deposits using a reamer or wire brush. Next‚ visually inspect for cracks or excessive wear. If damage is found‚ repairs or replacement may be necessary. Ensure all surfaces are free from debris to ensure proper fitment of the new guides. Use a dial bore gauge to measure guide bores for accuracy. This step ensures a smooth installation process and optimal engine performance.
6.2. Reaming the Guide Bores to the Correct Dimension
Reaming the guide bores ensures they match the new valve guides’ dimensions. Use a precision reamer to achieve the correct diameter‚ following the manufacturer’s specifications. Proper reaming prevents loose fitment or binding. Apply light pressure and maintain alignment to avoid damaging the cylinder head. After reaming‚ inspect the bores for smoothness and accuracy. This step is critical for proper valve stem lubrication and engine performance. Ensure no debris remains before proceeding with installation.
Installing the New Valve Guides
Press the new valve guides into position‚ ensuring proper alignment with the cylinder head. Use a special tool to avoid damaging the guides or seals during installation.
7.1. Proper Alignment and Fitting of the New Guides
Ensure the new valve guides are accurately aligned with the cylinder head’s guide bores. Proper fitting is crucial to prevent misalignment‚ which can lead to engine performance issues. Use precision tools to guide the valve into place‚ avoiding any force that might damage the components. Once aligned‚ gently press the guide into the bore until it seats firmly‚ ensuring a snug fit without over-tightening. This step requires patience and precision to guarantee optimal engine operation.
7.2. Using Precision Tools for Installation
The installation of new valve guides requires specialized tools to ensure accuracy and prevent damage. A dial bore gauge is essential for measuring the guide bores‚ while a precision reamer ensures the correct diameter. Use a guide installer or driver to seat the new guides properly. Air-powered tools can facilitate alignment‚ but manual alignment tools are often preferred for precision. Always follow manufacturer guidelines to avoid misalignment or damage during the fitting process.
Measuring and Adjusting the New Guides
Use precision tools like a dial bore gauge to verify the correct dimension of the installed guides‚ ensuring proper fitment and alignment for optimal engine performance.
8.1. Verifying the Correct Dimension of the Installed Guides
Use a dial bore gauge to measure the inside diameter of the valve guides‚ ensuring it matches the manufacturer’s specifications. Proper alignment and fit are crucial for optimal engine performance. Incorrect dimensions can lead to issues like oil leakage or valve misalignment. Always refer to the engine manual for precise measurements and tolerances. This step ensures the guides are correctly installed and functional.
8.2. Fine-Tuning the Guides for Proper Fit
After installation‚ use a precision reamer or hone to fine-tune the guides‚ ensuring a snug fit for the valve stems. Proper alignment and minimal clearance are essential to prevent binding or excessive wear. Lightly lubricate the valve stems and guides to test the fit. Make adjustments incrementally‚ checking frequently to avoid over-tightening. This step ensures optimal performance and longevity of the valve train components.
Replacing Valve Seals
Valve seals prevent oil leaks and ensure proper combustion. Replace them using the correct tools to avoid damage. Proper installation ensures optimal engine performance and prevents future issues.
9.1. Importance of Valve Seals in Engine Performance
Valve seals are crucial for preventing oil leakage into combustion chambers‚ ensuring efficient engine performance. They maintain proper engine operation by preventing oil consumption and reducing emissions. Worn seals can lead to rough idling‚ decreased power‚ and increased oil consumption. Replacing them is essential for restoring engine efficiency‚ reducing wear on moving parts‚ and maintaining optimal combustion. Properly installed seals ensure reliable engine function and prevent costly repairs down the line‚ making them a vital component in engine longevity.
9.2. Steps to Install New Valve Seals
Begin by removing the old valve seal carefully. Clean the area around the valve guide to ensure a proper fit. Lubricate the valve stem with oil before installation. Place the new seal over the guide‚ aligning it properly. Use a seal installation tool to gently press the seal into place. Ensure the valve stem is fully seated within the guide. Finally‚ verify the seal’s alignment and fit to prevent any leaks or damage during engine operation.

Lubrication and Final Checks
Lubricate the valve stems and guides with engine oil to ensure smooth operation. Conduct a final inspection to verify alignment and proper fit before engine reassembly.
10.1. Lubricating the Valve Stems and Guides
Apply a thin‚ even layer of engine oil to the valve stems and guides to reduce friction and ensure smooth operation. Use a clean‚ lint-free cloth to wipe away excess oil‚ ensuring no residue remains. Proper lubrication prevents overheating and wear‚ promoting optimal engine performance. This step is crucial before reassembling the engine‚ as it safeguards against potential damage during initial startup.
10.2. Final Inspection Before Reassembly
Conduct a thorough inspection of the installed valve guides and seals to ensure proper fitment and alignment. Use a dial bore gauge to verify the guide bores meet specifications. Check for any signs of damage or wear on the valve stems and guides. Ensure all components are clean and free from debris. Proper alignment and lubrication are critical for smooth engine operation and longevity. This final check guarantees reliability before engine startup.

Reassembling the Engine
Reinstall the rocker arms‚ timing chains‚ and intake manifold‚ ensuring proper alignment. Refer to the service manual for accurate torque specifications during reassembly to guarantee engine performance and reliability.
11.1. Reinstalling the Valve Train Components
Reinstalling the valve train components requires precision. Start by carefully placing the rocker arms back into their respective positions‚ ensuring they align with the valve stems. Next‚ reattach the timing chains‚ making sure they are properly tensioned to avoid any misalignment or noise during engine operation. Finally‚ reassemble the intake and exhaust manifolds‚ ensuring all connections are secure and gaskets are correctly seated to prevent leaks. Proper reassembly ensures smooth engine functionality and prevents potential damage from misaligned components.
11.2. Ensuring Proper Alignment and Function
Ensuring proper alignment and function is crucial after reinstalling the valve train. Double-check that all components‚ such as rocker arms and timing chains‚ are correctly positioned and securely fastened. Verify that the valve stems move smoothly within the guides without binding or excessive play. Use a torque wrench to ensure all bolts are tightened to the manufacturer’s specifications. Finally‚ perform a test drive to confirm proper engine operation‚ ensuring there are no unusual noises or performance issues.
Testing the Engine
After installing new valve guides and seals‚ start the engine and check for proper operation. Monitor for leaks or unusual noises during the test drive.
12.1. Initial Startup and Performance Check
After completing the installation‚ start the engine and let it run at idle. Listen for any unusual noises and monitor for oil leaks around the valve guides. Check engine performance for smooth operation and ensure there are no signs of rough idling or misfires. Verify proper function of the PCV valve and other related components to ensure optimal performance and prevent potential issues.
12.2. Monitoring for Leaks or Other Issues
After starting the engine‚ closely monitor for any signs of leaks around the valve guides and seals. Check for oil droplets or smoke‚ which could indicate improper sealing. Also‚ watch for performance issues such as rough idling or reduced power. Use tools to measure oil consumption and ensure no excessive levels are present. Address any concerns promptly to prevent further damage and maintain optimal engine efficiency.
Common Mistakes to Avoid
Avoid improper measurements‚ using incorrect tools‚ and neglecting to ream guide bores to the correct dimension. These errors can lead to misaligned valves and engine damage. Always follow precise installation procedures to ensure a successful replacement and maintain engine performance. Proper alignment and sizing are crucial for optimal functionality and longevity of the valve guides.
13.1. Errors in Measurement and Installation
Incorrect measurements and improper installation are common mistakes that can lead to misalignment and engine damage. Using the wrong tools or failing to ream guide bores to the correct dimension can cause valves to bind or leak. Ensure precise alignment and sizing during installation to prevent performance issues. Always double-check measurements and follow proper techniques to avoid costly errors and ensure proper valve function and engine longevity.
13.2. Importance of Following Proper Procedures
Adhering to established procedures is crucial for successful valve guide installation. Skipping steps like honing or proper reaming can lead to valve binding or engine damage. Using specialized tools‚ such as dial bore gauges and precision reamers‚ ensures accuracy. Proper lubrication and alignment are also vital to prevent wear and tear. Following guidelines minimizes risks‚ ensuring optimal engine performance and longevity. Neglecting these steps can result in costly repairs and compromised engine efficiency.
Safety Tips and Precautions
Always wear safety glasses and ear protection when working with air tools. Ensure proper ventilation to avoid inhaling fumes or debris. Handle sharp components carefully to prevent injuries. Use appropriate tools to avoid damaging new guides or engine components. Keep loose clothing tied back and long hair secured. Maintain a clean workspace to prevent accidents and ensure precise workmanship throughout the installation process. Regularly inspect tools for damage to prevent malfunction during critical steps. Never rush through procedures; patience is key to a successful installation. Use protective gloves when handling metal parts to avoid cuts and abrasions. Always refer to the manufacturer’s guidelines for specific safety recommendations tailored to your engine type. Properly secure the engine block to prevent movement during reaming or pressing guides. Ensure all power tools are properly grounded to avoid electrical hazards. Be cautious when using compressed air to avoid spraying debris unpredictably. Keep a fire extinguisher nearby in case of emergencies. Never smoke or have open flames near flammable materials like engine oils or fuels. Regularly clean and inspect your tools to maintain their effectiveness and prevent contamination of engine components. By following these safety tips‚ you can protect yourself and ensure a safe working environment during the valve guide installation process. Always unplug power tools when not in use to prevent accidental startups. Keep children and pets away from the workspace to avoid distractions and potential hazards. Properly dispose of all waste materials‚ including used oils and metal shavings‚ to maintain an environmentally friendly workspace. Stay alert and avoid working when fatigued to maintain focus and precision. Use jack stands to support the vehicle when working underneath it‚ ensuring it is securely lifted and stable. Never rely solely on a jack; always use additional support for safety. Be aware of your surroundings and ensure all cables and hoses are safely routed away from moving parts. Regularly check the temperature of components to avoid overheating during machining processes. Use proper lifting techniques to prevent strain or injury when handling heavy engine parts. Keep a first aid kit nearby in case of minor accidents or injuries. By prioritizing safety‚ you can complete the valve guide installation efficiently and without incident; Always follow the recommended torque specifications when tightening bolts and fasteners to prevent over-tightening or stripping threads. Use threadlocker where specified to ensure components remain secure over time. Be mindful of the engine’s condition and address any additional issues found during the installation to prevent future problems. Avoid using damaged or worn-out tools‚ as they can lead to improper installation and potential engine damage. Stay organized by keeping all parts and tools in designated areas to avoid misplacement or loss. Double-check all measurements and alignments before proceeding to ensure accuracy and prevent costly rework. Use protective covers on sensitive components to prevent contamination from dust or debris during the installation process. Always refer to the engine’s service manual for specific safety guidelines and recommendations. By adhering to these precautions‚ you can safeguard your well-being and achieve a professional-quality valve guide installation. Remember‚ safety should never be compromised for the sake of convenience or speed. Take your time and prioritize caution in every step of the process. A safe workspace is not only protective of your health but also conducive to producing high-quality work. Stay vigilant and proactive in identifying potential hazards‚ and take measures to mitigate them before they become issues. Your safety and the integrity of your engine are worth the extra effort and attention to detail. Always be prepared for unexpected situations and have a plan in place to handle them effectively. Through careful planning and adherence to safety protocols‚ you can successfully install valve guides and maintain your engine’s performance for years to come.
14.1. Personal Protective Equipment and Safety Measures
Wearing safety glasses and ear protection is essential when using air tools to prevent eye and hearing damage. Use gloves to handle sharp components and avoid cuts. Ensure proper ventilation to prevent inhaling harmful fumes. Secure loose clothing and tie back long hair to avoid accidents. Keep a fire extinguisher nearby and avoid smoking near flammable materials. Always maintain a clean‚ organized workspace to minimize hazards and ensure precision in your work. Regularly inspect tools for damage and wear‚ replacing them as needed to prevent malfunctions. Avoid working in poorly lit areas to maintain clear visibility of small parts and tools. Use non-slip mats or surfaces to prevent tools from slipping and causing injuries. Keep emergency contact information accessible in case of accidents. Prioritize your safety by following these guidelines to protect yourself during the valve guide installation process. By taking these precautions‚ you can create a safer working environment and reduce the risk of injury or damage. Stay alert and focused to ensure each step is executed safely and effectively. Proper safety measures not only protect your well-being but also contribute to the success of the installation. Always consider potential hazards and take proactive steps to mitigate them before they become issues. Your safety is paramount‚ so never compromise on protective equipment and safe practices. A well-prepared workspace and adherence to safety protocols will help you achieve a professional-quality installation while safeguarding your health. Remember‚ safety should always be your top priority when working with power tools and engine components. By being vigilant and prepared‚ you can complete the task efficiently and securely. Always double-check your equipment and surroundings before starting any procedure to ensure a safe working environment. Protecting yourself and your tools is an investment in both your well-being and the quality of your work. Stay safe and work responsibly throughout the entire process.
14.2. Handling Special Tools and Materials
Special tools like dial bore gauges and precision reamers require careful handling to maintain accuracy. Store them in protective cases to prevent damage. When using reamers‚ apply gentle‚ consistent pressure to avoid overheating or damaging the valve guides. Ensure all materials‚ such as new valve guides and seals‚ are free from contaminants and handled with clean‚ dry gloves to prevent oil or dirt transfer. Properly lubricate tools before use to reduce friction and prevent wear. Regularly inspect tools for signs of wear or damage‚ replacing them when necessary to ensure precise results. Use the correct techniques when installing components‚ as improper handling can lead to misalignment or damage. Always refer to the manufacturer’s instructions for specific tool usage and care. Keep all materials organized and within easy reach to maintain efficiency; Avoid using tools beyond their intended purpose to prevent breakage or injury. Handle valve guides with care‚ as they can be brittle and prone to cracking if dropped or mishandled. Use appropriate lifting techniques to maneuver heavy tools or equipment to prevent strain or accidents. By meticulously handling special tools and materials‚ you can ensure the integrity of your work and achieve professional-grade results. Proper care and handling not only extend the life of your tools but also contribute to a successful installation. Always maintain a clean and organized workspace to minimize the risk of damage or loss. Regularly clean and maintain tools to ensure optimal performance and accuracy. Replace worn or damaged tools promptly to avoid compromising the quality of your work. Handling tools and materials with care is essential for achieving precise and durable results in valve guide installation. Protect your investment in tools and materials by treating them with the respect and attention they require. This careful approach will help you complete the task effectively and safely‚ ensuring long-term engine performance. Regular maintenance of tools and materials is crucial for consistent reliability and accuracy in your work. By adhering to proper handling practices‚ you can ensure that your tools remain in excellent condition and perform as expected during the installation process. Properly caring for your tools and materials is an integral part of achieving a successful and professional valve guide installation. Always prioritize the condition and handling of your tools to maintain their effectiveness and extend their lifespan. This dedication to tool care will enhance the overall quality of your work and contribute to a safer‚ more efficient process.
Proper valve guide installation is crucial for optimal engine performance and longevity. By following precise steps and using the right tools‚ you ensure a successful replacement. This comprehensive guide has provided detailed insights and expert tips‚ helping you achieve professional results. Regular maintenance and careful handling of tools will keep your engine running smoothly‚ ensuring durability and efficiency. A well-executed installation enhances performance‚ reduces oil consumption‚ and prevents future issues‚ giving you peace of mind and a reliable engine.
15.1. Summary of the Installation Process
Installing valve guides requires precision and attention to detail. The process involves measuring existing guides‚ removing worn ones‚ preparing the cylinder head‚ and fitting new guides. Special tools like reamers and presses are essential for accurate alignment and sizing; Proper lubrication and final inspections ensure optimal performance; By following these steps‚ you can restore engine efficiency‚ reduce oil consumption‚ and prevent future issues. This guide has provided a clear roadmap for a successful installation‚ emphasizing the importance of precision and proper technique.
15.2. Final Thoughts on Maintaining Engine Performance
Properly installed valve guides are essential for long-term engine efficiency and durability. Regular inspections and addressing symptoms like oil consumption or rough idling can prevent major repairs. By following precise installation steps and using quality materials‚ you ensure optimal performance. Remember‚ maintaining engine health requires attention to detail and timely interventions. This guide has equipped you with the knowledge to handle valve guide installations confidently‚ contributing to a smoother and more reliable engine operation over time.